Table of Contents
- 1. Introduction to Walking the Cup Technique
- 2. Benefits of Walking the Cup
- 3. Necessary Equipment and Safety Precautions
- 4. Setting Up Your TIG Welding Machine
- 5. Selecting the Right Cup Size and Tungsten
- 6. Preparing the Workpiece and Cleaning
- 7. Establishing Proper Torch Angle
- 8. Initiating the Arc and Starting the Weld
- 9. Controlling Torch Movement and Filler Rod
- 10. Achieving Consistent Welding Speed
- 11. Managing Heat and Avoiding Distortion
- 12. Troubleshooting Common Issues
- 13. Practice and Skill Development
- 14. Mastering Advanced Applications
- Unveiling the Depths of Walking the Cup
- Unveiling the Concept: What is Walking the Cup in Welding?
- The Strength Within: Is Walking the Cup a Strong Weld?
- Unearthing the Purpose: The Role of Walking the Cup in GTAW Pipe Welding
- 15. Conclusion
- FAQs
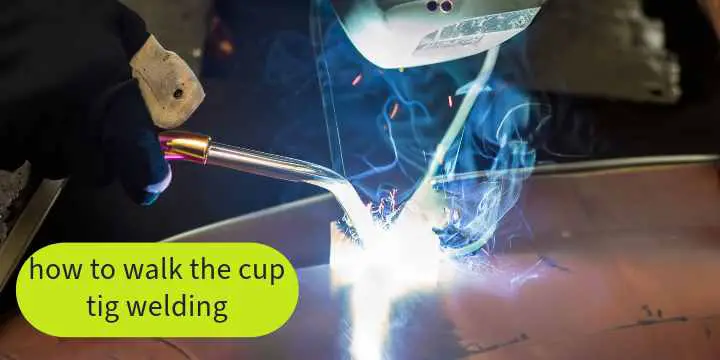
Tungsten Inert Gas (TIG) welding is a precise and versatile welding process used in various industries, from aerospace to automotive. One of the advanced techniques within TIG welding is “walking the cup.” This method requires skill and practice, but when mastered, it can result in clean and consistent welds. In this guide, we’ll walk you through the steps of how to walk the cup in TIG welding, from setting up your equipment to achieving seamless welds.
1. Introduction to Walking the Cup Technique
Walking the cup is a TIG welding technique that involves using a specialized ceramic cup as a guide for the welding torch. This method offers greater stability and control, making it ideal for welding thicker materials and intricate joints.
2. Benefits of Walking the Cup
Walking the cupping technique provides several advantages, including:
- Enhanced Control: The cup’s guide helps maintain a consistent torch-to-workpiece distance, resulting in more precise welds.
- Reduced Fatigue: The cup’s support reduces the strain on the welder’s hand, allowing for longer welding sessions.
- Improved Weld Aesthetics: Walking the cup produces clean and uniform weld beads, enhancing the overall appearance of the weld.
- Versatility: This technique is suitable for both flat and curved surfaces, making it versatile for various welding projects.
3. Necessary Equipment and Safety Precautions
Before you begin, gather the following equipment:
- TIG welding machine
- Welding torch with a walking cup attachment
- Gas supply (argon or helium)
- Welding gloves and protective clothing
- Safety goggles or helmet with a proper shade
Safety precautions are crucial. Ensure proper ventilation, wear appropriate personal protective equipment, and follow all welding safety guidelines.
4. Setting Up Your TIG Welding Machine
Start by setting up your TIG welding machine according to the manufacturer’s instructions. Ensure the gas flow and polarity settings are correct for the type of metal you’re welding.
5. Selecting the Right Cup Size and Tungsten
Choose a cup size based on the joint’s complexity and the material thickness. Larger cups provide more stability, while smaller cups offer better visibility. Select a tungsten electrode suitable for your welding application.
6. Preparing the Workpiece and Cleaning
Thoroughly clean the workpiece to remove any contaminants, rust, or debris. Proper cleaning ensures a solid and contamination-free weld.
7. Establishing Proper Torch Angle
Hold the torch at a slight upward angle, approximately 10-15 degrees from vertical. This angle helps direct the heat and filler metal into the joint effectively.
8. Initiating the Arc and Starting the Weld
Touch the tungsten to the workpiece and lift it slightly to establish the arc. Once the arc is initiated, slowly move the torch along the joint’s starting point, creating a small weld puddle.
9. Controlling Torch Movement and Filler Rod
Gently rest the cup’s edge on the workpiece, using it as a guide. Maintain a consistent torch-to-workpiece distance as you move along the joint. Simultaneously, feed the filler rod into the weld puddle using steady, even motions.
10. Achieving Consistent Welding Speed
Maintain a steady and controlled welding speed to create uniform weld beads. Too fast may result in incomplete fusion, while too slow may cause excessive heat buildup.
11. Managing Heat and Avoiding Distortion
Alternate between short welds and allow the metal to cool to prevent distortion. Properly managing heat input is crucial to achieving strong and durable welds.
12. Troubleshooting Common Issues
If you encounter issues such as porosity or uneven bead appearance, troubleshoot by adjusting torch angle, travel speed, or gas flow.
13. Practice and Skill Development
Mastering the walking the cup technique takes practice. Start with simple joints and gradually progress to more complex projects to refine your skills.
14. Mastering Advanced Applications
Once you’ve mastered the basics, you can apply the walking the cup technique to challenging welds, including pipe welding and intricate metal art.
Unveiling the Depths of Walking the Cup
For those stepping into the realm of welding for the first time, it’s highly likely that you’ve cast your gaze upon those immaculately crafted grooves, prompting contemplation on how one might master the art of replicating such welds.
This artistry, achieved through the utilization of the esteemed TIG pipe welding technique known as “walking the cup,” stands as a testament to the intricacies of the craft.
Yet, let it be acknowledged that this process is far from facile.
“Walking the cup” constitutes a welding methodology of considerable sophistication, one demanding extensive periods of dedicated refinement to attain proficiency.
The core concept is deceptively uncomplicated in its explanation.
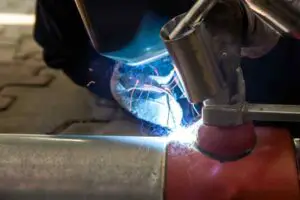
Embarking upon the journey of “walking the cup,” one must delicately position the cup of the welding torch in intimate contact with the foundational material destined for fusion. This maneuver must occur within a carefully carved groove, guiding the weld along its intended course.
Equipped with complete dominion over the torch’s handle, execute a rhythmic oscillation, deftly swaying back and forth, exerting a mere whisper of pressure upon the cup, all while steadily propelling forward with unwavering velocity.
Thus, the process concludes.
Although “walking the cup” presents itself as an ostensibly straightforward welding technique, its widespread adoption and endorsement by welders across the globe bear testament to its efficacy as an entry point into the realm of pipe welding.
Furthermore, its allure is augmented by the fact that safety concerns are kept to a minimum for the welder, significantly diminishing the prospect of welding-related mishaps in any form.
Unveiling the Concept: What is Walking the Cup in Welding?
Walking the cup is a refined and controlled approach employed in Tungsten Inert Gas (TIG) welding, where the welder moves the torch in a rhythmic, circular motion along the joint being welded. This technique derives its name from the cup-shaped welding torch, designed to maintain consistent gas coverage and protect the weld pool from atmospheric contaminants. The controlled motion ensures uniform heat distribution, leading to precise and clean welds.
The Strength Within: Is Walking the Cup a Strong Weld?
Absolutely! Walking the cupping technique offers exceptional strength and integrity to welds, making it a preferred choice for various welding applications. By maintaining a steady and regulated torch movement, the welder ensures even fusion of base metals, resulting in a robust and enduring joint. This method is particularly advantageous when working with materials that demand high structural integrity, such as stainless steel, aluminum, and exotic alloys.
Unearthing the Purpose: The Role of Walking the Cup in GTAW Pipe Welding
The walking-the-cupping technique finds its prominence in Gas Tungsten Arc Welding (GTAW), commonly known as TIG welding, for pipe fabrication. Welding pipe requires meticulous attention to detail, as the quality and durability of the weld are paramount. Walking the cupping technique proves invaluable in this context, as it enables the welder to maintain consistent torch-to-work distance, precise control over heat input, and uniform filler metal deposition. These factors collectively contribute to flawless, leak-free pipe welds that meet the highest industry standards.
15. Conclusion
Walking the cup is a valuable skill for TIG welders seeking precision and control in their work. With the right equipment, technique, and practice, you can achieve clean and consistent welds for various applications.
FAQs
Q1. Is the walking-the-cup technique suitable for all TIG welding projects?
Yes, walking the cup can be applied to a wide range of TIG welding projects, from small-scale repairs to large fabrication work.
Q2. Can I use any type of cup for walking the cup technique?
It’s recommended to use specialized ceramic cups designed for this technique, as they provide the best support and stability.
Q3. What are some common mistakes to avoid while learning this technique?
Beginners should avoid excessive heat input, inconsistent torch movement, and inadequate filler rod control.
Q4. How long does it take to become proficient in walking the cup welding?
The learning curve varies for each individual, but consistent practice over several weeks can lead to significant improvement.
Q5. Where can I find more resources to enhance my TIG welding skills?
You can find more resources to improve your TIG welding skills through online tutorials, community forums, workshops, technical books, online welding communities, trade shows, welding magazines, and industry publications.
2 thoughts on “How to Walk the Cup in TIG Welding: A Step-by-Step Guide”