Table of Contents
- How to Clean Welding Helmet
- Gathering the Necessary Supplies
- Preparation Before Cleaning
- Cleaning the Helmet Exterior
- Cleaning the Viewing Lens
- Cleaning the Headgear
- Cleaning the Helmet Interior
- Removing Stubborn Stains and Splatter
- Drying and Assembling
- Maintaining Your Welding Helmet
- How do you clean a welding helmet filter?
- How do you fix an auto-darkening welding helmet?
- How do you darken a welding helmet?
- How do you stop glare in a welding helmet?
- Do welding helmets expire?
- How long do auto-darkening helmets last?
- Conclusion
- FAQs About How to Clean Welding Helmet
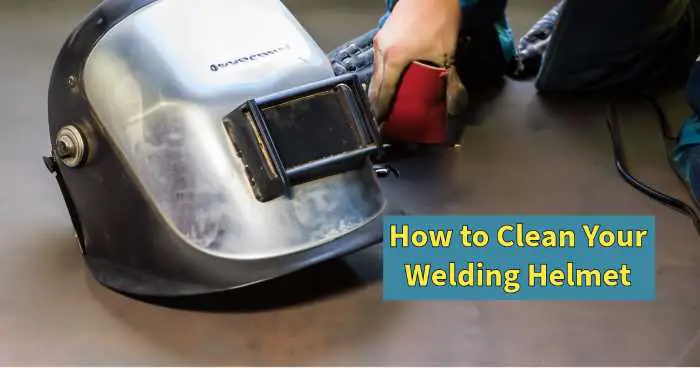
Clean Welding Helmet: Master the Art of Pristine Gear Care!
When it comes to welding, safety and visibility are paramount. A welding helmet not only protects your eyes and face from sparks and harmful rays but also ensures clear vision during the welding process. However, over time, welding helmets can accumulate dirt, debris, and even splatter from the welding process itself. Regular cleaning is essential to maintain the effectiveness of your welding helmet and ensure your safety. In this guide, we will take you through the step-by-step process of cleaning your welding helmet to keep it in optimal condition.
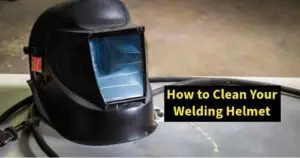
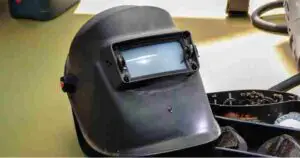
How to Clean Welding Helmet
Keeping your welding helmet clean is a straightforward process that requires attention to detail. Follow these steps to maintain optimal clarity and protection:
Gathering the Necessary Supplies
Before you start cleaning your welding helmet, gather the following supplies:
- Soft bristle brush
- Mild soap or helmet-cleaning solution
- Warm water
- Microfiber or soft cloth
- Cotton swabs
- Safety gloves
Preparation Before Cleaning
Ensure your welding helmet is disconnected from any power sources and placed on a stable surface. Detach the headgear if possible, and remove the viewing lens for separate cleaning.
Cleaning the Helmet Exterior
- Dip the soft bristle brush in a mixture of mild soap and warm water.
- Gently scrub the helmet’s exterior, focusing on areas with visible dirt and debris.
- Wipe the exterior with a damp cloth to remove soap residue.
- Dry the exterior with a clean, dry cloth.
Cleaning the Viewing Lens
- Hold the viewing lens by the edges to avoid fingerprints.
- Clean the lens with a microfiber cloth using gentle circular motions.
- For stubborn spots, use a cotton swab slightly dampened with water.
- Dry the lens completely before reattaching it to the helmet.
Cleaning the Headgear
- If the headgear is detachable, remove it from the helmet.
- Wipe down the headgear straps and pads with a damp cloth.
- Allow the headgear to air dry completely before reattaching it.
Cleaning the Helmet Interior
- Inspect the interior for dust, sweat, or grime.
- Gently wipe the interior with a damp cloth.
- For fabric linings, consider using a fabric-safe disinfectant spray.
- Allow the interior to air dry.
Removing Stubborn Stains and Splatter
- For stubborn stains or welding splatter, moisten a cloth with mild soap.
- Place the cloth over the stain for a few minutes to soften it.
- Gently scrub the stain with the cloth, avoiding excessive force to prevent damage.
Drying and Assembling
Ensure all parts are completely dry before reassembling the helmet. This prevents mold growth and maintains helmet integrity.
Maintaining Your Welding Helmet
- Clean your helmet after each use to prevent buildup.
- Store your helmet in a cool, dry place away from direct sunlight.
- Inspect the helmet regularly for signs of wear or damage.
How do you clean a welding helmet filter?
Cleaning a welding helmet filter is crucial to ensure clear vision and proper protection. Here’s a detailed process:
- Remove the Filter: Depending on the type of welding helmet you have, remove the filter lens. Most modern welding helmets have a front cover lens and a main auto-darkening lens.
- Inspect the Lens: Examine the lens for dirt, debris, and any signs of damage. If the lens is scratched or cracked, it’s recommended to replace it.
- Gently Wipe the Lens: Use a soft, lint-free cloth to gently wipe the lens. If there’s loose debris, you can blow it off or use compressed air.
- Avoid Abrasives: Avoid using abrasive materials or harsh chemicals to clean the lens, as they can damage the anti-glare coatings or the auto-darkening mechanism.
- Reassemble: Carefully reassemble the lens, ensuring it’s properly seated and aligned. Replace the front cover lens if necessary.
- Regular Maintenance: Clean the lens after each use to prevent the accumulation of welding spatter, dirt, and dust.
How do you fix an auto-darkening welding helmet?
If your auto-darkening welding helmet is malfunctioning, here’s a step-by-step approach to troubleshooting:
- Check the Battery: Most auto-darkening helmets use batteries to power the auto-darkening function. Replace the batteries if they are weak or depleted.
- Inspect the Sensors: Sensors detect the welding arc and trigger the auto-darkening feature. Ensure the sensors are clean and free from debris, as dirt can interfere with their functionality.
- Adjust Sensitivity: Some helmets allow you to adjust the sensitivity of the sensors. If the helmet isn’t darkening properly, try adjusting the sensitivity settings to match your welding process.
- Check for Damage: Inspect the helmet for any physical damage that could be affecting its performance. Cracks or impact damage might require professional repair.
- Professional Help: If the issue persists, it’s advisable to contact the manufacturer or a professional welding helmet repair service for assistance.
How do you darken a welding helmet?
Modern auto-darkening welding helmets adjust the shade of the lens automatically when you strike an arc. Here’s how to ensure optimal darkening:
- Set Sensitivity and Delay: Most auto-darkening helmets have controls for sensitivity and delay settings. Sensitivity adjusts how easily the helmet darkens, while delay controls how quickly it returns to the clear state after welding.
- Test in a Safe Environment: Before you start welding, test the helmet’s darkening function by striking an arc in a safe environment. Adjust the settings until you’re comfortable with the speed of darkening and clearing.
- Angle of Helmet: Position the helmet so that you have a clear view of the welding area. Adjust the angle for comfort and visibility.
How do you stop glare in a welding helmet?
Glare in a welding helmet can reduce visibility and cause eye strain. Here are steps to minimize glare:
- Clean the Lens: Regularly clean the lens to remove dirt, spatter, and debris. A clean lens provides better visibility.
- Anti-Glare Coatings: Some helmets come with anti-glare coatings on the lens. Consider using a helmet with this feature to reduce glare.
- Angle Adjustment: Adjust the angle of the helmet to prevent direct light from entering the lens and causing glare.
- Use Proper Eye Protection: Wear appropriate safety glasses or goggles under the welding helmet to further protect your eyes from glare and debris.
Do welding helmets expire?
Welding helmets don’t have a specific expiration date, but their effectiveness can diminish over time. Factors such as exposure to extreme temperatures, impacts, and wear and tear can affect their performance. Regularly inspect your helmet for cracks, damage, or signs of wear. If you notice any deterioration, it’s best to replace the helmet to ensure your safety.
How long do auto-darkening helmets last?
The lifespan of auto-darkening helmets varies depending on factors like usage, quality, and maintenance. High-quality helmets from reputable brands can last for many years with proper care. Lower-quality helmets might have a shorter lifespan. To extend the life of your auto-darkening helmet:
- Store it in a cool, dry place away from direct sunlight.
- Clean the lens and helmet regularly to prevent dirt and debris buildup.
- Avoid dropping the helmet or subjecting it to impacts.
If you notice the auto-darkening function becoming inconsistent or the helmet’s overall condition deteriorating, it might be time to consider a replacement or professional inspection.
Conclusion
By following these steps, you can ensure that your welding helmet remains in excellent condition, providing optimal safety and visibility during your welding tasks. Regular cleaning and maintenance not only extend the life of your helmet but also contribute to your overall welding experience.
FAQs About How to Clean Welding Helmet
Q: How often should I clean my welding helmet? Regular cleaning is recommended, especially after each welding session. If you notice dirt or smudges during work, clean the lens immediately.
Q: Can I use regular glass cleaner on the helmet lens? No, it’s best to avoid harsh chemicals like glass cleaners, as they can damage the lens coating. Stick to mild soap and water or specialized helmet cleaning solutions.
Q: Is it okay to wash the headgear in a washing machine? It’s not advisable, as washing machines can be too rough on the delicate headgear. Hand wash it gently with mild soap and water.
Q: What’s the importance of cleaning the lens in a welding helmet? Cleaning the lens ensures clear visibility, allowing you to see your work accurately and preventing potential accidents.
Q: Can I use compressed air to remove debris from the helmet’s interior? While it might seem effective, using compressed air can actually push debris further into the helmet’s nooks. Stick to gentle brushing and wiping for interior cleaning.
Q: Are there specialized cleaning kits for welding helmets? Yes, many welding supply stores offer cleaning kits designed specifically for welding helmets. These kits often contain the right cleaning agents and tools for the job.
6 thoughts on “How to Clean Your Welding Helmet: A Step-by-Step Guide”